
 Science Daily: Mars
- Surprising insights about debris flows on Mars March 14, 2024
- Giant volcano discovered on Mars March 13, 2024
Science Daily: Uranus
- New images reveal what Neptune and Uranus really look like January 5, 2024
- Ringing in the holidays with ringed planet Uranus December 19, 2023
Science Daily: Pluto
- How Pluto got its heart April 15, 2024
- Evidence of geothermal activity within icy dwarf planets February 15, 2024
Science Daily: Kuiper Belt
- How Pluto got its heart April 15, 2024
- Evidence of geothermal activity within icy dwarf planets February 15, 2024
Sometimes, you just have to keep asking the same question over and over again until you get a good answer.
PixInsight has some really good background/gradient removal tools and if you use PixInsight, you’re immediately thinking of the Dynamic Background Extraction (DBE) or Automatic Background Extraction (ABE). Truth is, that’s what I always think of, too. But there’s another approach documented here which they call multiscale gradient removal. It’s clever, it’s perfect for wide-field images where DBE and ABE don’t work well, and I used to do a variation of it with my old film images and completely forgot, doh!
With film images, you never have flats or darks to calibrate your images and, more often than not, you have light pollution gradients. For those of you living in some remote land with world class dark skies, please stop snickering, the struggle is real for most of us. So, when you end up with a good image that is well exposed, but you’ve got that pesky gradient, what do you do?
The old trick was to use clone-stamp or equivalent (GIMP, Photoshop, etc.) to remove any bright stars (faint ones don’t matter for this), then run a very large Gaussian blur on the image, smearing out any features so you effectively have “regional” average of the image. That’s your background model. Subtract that from the original, probably throwing in an offset to keep values from going negative (and getting clipped to zero), and presto, you’ve removed the gradient. You probably also removed some gross structure if you have bright nebula or the Milky Way, but at least the gradient is gone.
Enter PixInsight and multiscale processing. It does the moral equivalent in a mathematically more nuanced way that keeps your structure intact.
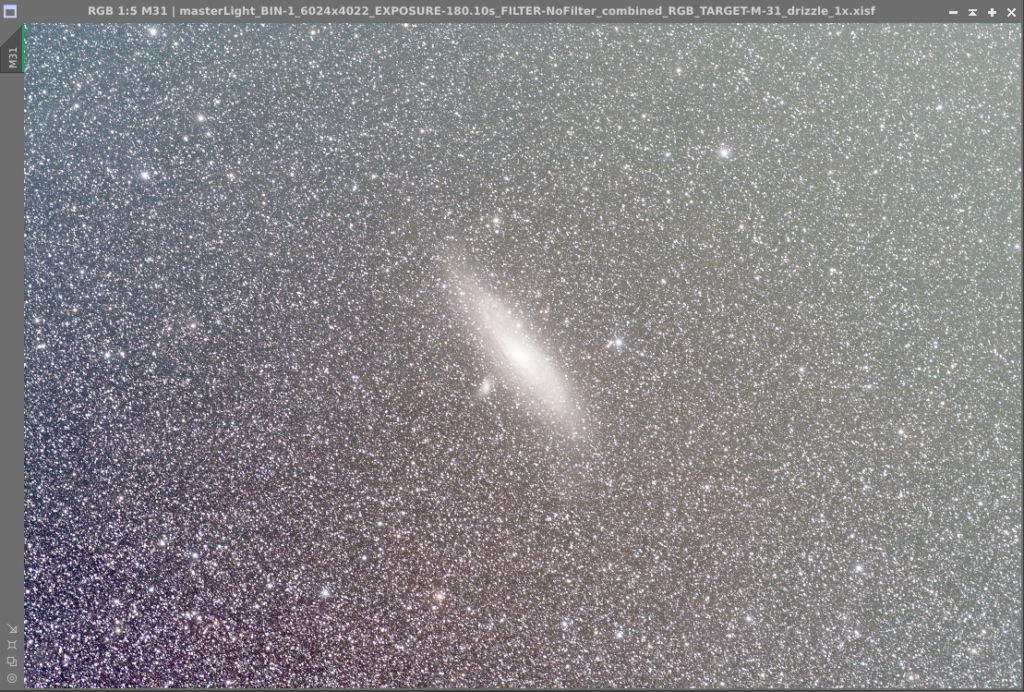
Here’s a before image of a 6°x9° region including M31. There are simply too many stars for DBE or ABE to work effectively; you can’t find open areas dominated by background.
And here’s the “after” image after subtracting the gradient using the multiscale gradient removal technique.

You might be thinking that it still looks gross. I used a boosted screen stretch in both cases to draw out the main feature: the background is now uniform, the gradient is gone.
The above image hasn’t undergone any color calibration, you’re looking at the result of integrating 55 3-minute DSLR images that were fully calibrated (darks and flats) and ends up with a horrible sky gradient. This is just the starting point.
Since I love doing the wider field images, I can’t begin to describe how happy I am to have found this. I had completely forgotten about doing this with film images, and the median transform is definitely cleaner than the old Gaussian blur.
Oh, there are a few things about that tutorial. It’s a couple of years old at this point and the author makes a point of how the MMT transformation can’t do more than 8 layers. That’s no longer true which make doing this on large images much more convenient. For this image, I used 12 layers and removed 11; I really needed to remove all 11 because M31 still shows as a faint smudge-like feature removing only 10.